6 Commonly Used Usb Cable Testing Methods During Production
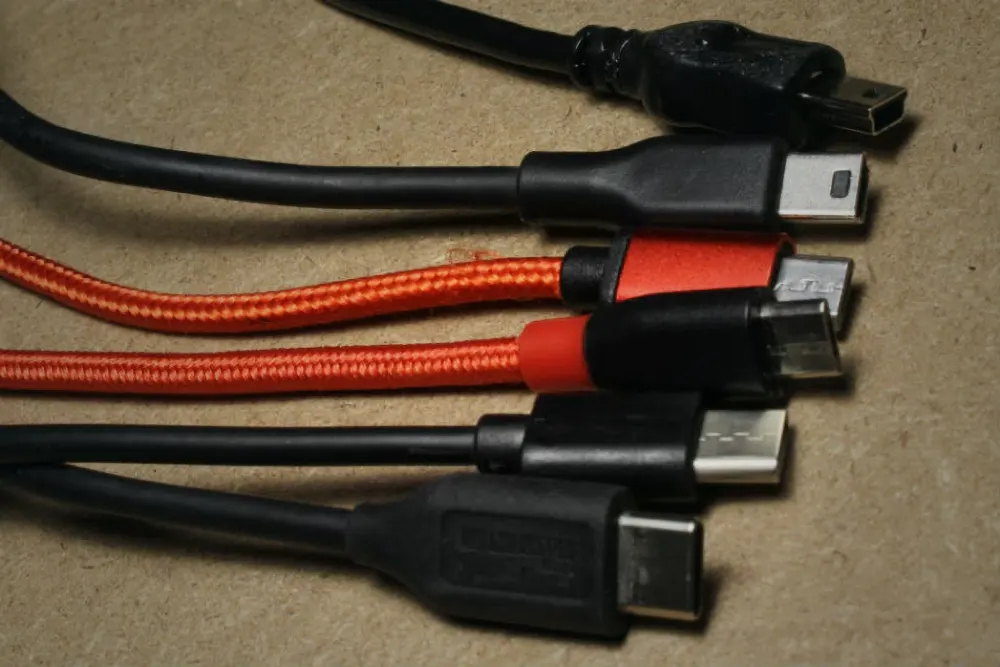
Want to make sure your USB cables are working properly? No matter, if you’re a tech guru, a hands-on DIYer, or a pro in electronics, knowing how to test USB cables is crucial. It’s all about making sure your devices charge smoothly and data transfers happen seamlessly.
At APPHONE as a professional USB Cable manufacturer, these USB cable tests have more importance than anything in cable line production. These USB cable testing methods are the key to our quality standards. In this article, we’ll walk you through various techniques, like electrical testing, push-and-pull tests, salt spray tests, high-temperature tests, and many more. These tests are performed to make sure our customers get their hands on the highest-quality USB cables out there. So, are you ready to ensure your USB cables are top-notch? Let’s jump in and discover how we guarantee the quality and reliability of USB cables with these USB mobile cable testing methods;
What Are the USB Cable Detection Methods?
So, what is the best USB cable detection method? In this part of the article, we will share below USB cable test methods in detail.
- Electrical testing
- Push and Pull Force Test
- Rocking test/Swing Test
- Unplug and plug Test
- Salt Spray Test
- Temperature test & High-temperature test
Now let’s see how you can perform these phone cable tests on your USB cables with perfection.
Electrical Testing Methods
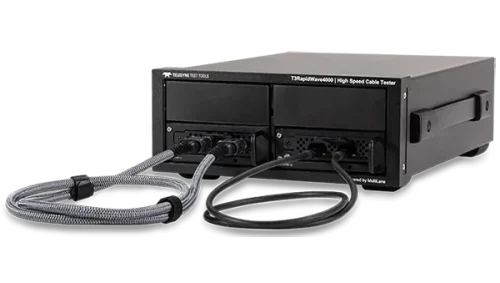
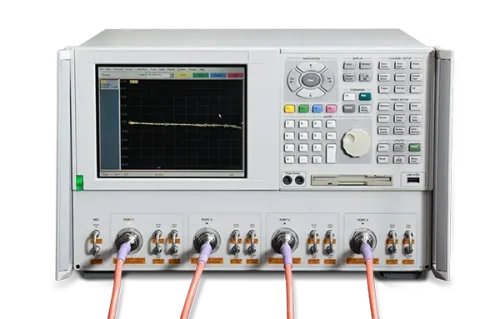
The electrical testing method involves analyzing the electrical characteristics of a USB cable to determine its presence and functionality. It typically includes three key tests, continuity test, resistance test, and voltage level test. Here is the detail about all three electrical testing methods. At APPHONE, during USB data cable production, after the primary injection molding step, we use power detectors to test the eclectic performance of the cable. These tests are key to making sure the cables are of high quality and avoiding flow of the defective products in the next step of USB cable production. Let’s find out more about these tests.
Continuity Test:
The continuity test is best to perform when validating the connection of wires within the USB cable and for proper data line testing. It will ensure uninterrupted data transmission. It entails the passage of a low electrical current through the wires while gauging the resistance. A consistent and low resistance reading signifies that the wires are effectively connected, affirming seamless data flow. Here’s how to perform a continuity test on a USB cable with a power detector:
Equipment Needed: Power Detector;
Steps to Perform this Test:
- Turn off the power supply and disconnect the USB cable from any devices.
- Locate the connectors on both ends of the USB cable.
- Turn on the power detector and ensure it is in the continuity testing mode. Most power detectors have a continuity function that will emit a tone or display a value when there is a continuous electrical path.
- Plug one end of the USB cable into the power detector.
- With the detector set up, touch its probes to the metal parts inside the USB plugs.
- The power detector will indicate if there’s a good connection between the pins. That means electricity flows properly through the cable.
- Repeat the testing for each metal part inside both plugs to make sure the whole cable is working.
If the tester shows there’s a connection for all pins, your USB cable is okay. If not, there might be a problem with the cable.
Resistance Test
The resistance test is performed to measure the resistance of wires within the USB cable to pinpoint any instances of breaks or damage. By measuring resistance at various points along the cable, deviations in resistance levels can indicate potential issues such as fractured wires or damage compromising conductivity. Here’s how to perform a resistance test on a USB cable:
Equipment Needed: Power Detector
Steps to Perform this Test:
- Turn off the power supply and disconnect the USB cable from any devices if connected.
- Locate the connectors on both ends of the USB cable.
- Turn on the power detector and ensure it is in the resistance testing mode. It will display results in the measured resistance value.
- Touch the probes of the power detector to the corresponding pins inside the USB plugs.
- Check and record the resistance value displayed on the power detector.
- Repeat the resistance measurement for each pin inside both plugs to ensure consistency.
The resistance value should be relatively low, typically within the range of a few ohms (Ω), depending on the length and thickness of the USB cable. If the resistance value is significantly higher than expected, it may indicate a problem with the cable, such as a broken connection or a faulty wire. As a general guideline, the resistance value should be consistent across all corresponding pin pairs. Significant variations in resistance between pin pairs may suggest an issue with the cable.
Voltage Level Test
The voltage level test scrutinizes the voltage levels across the power lines of the USB cable to ascertain its ability to deliver requisite power to connected devices. This test entails measuring the voltage at different points along the cable. Significant deviations from expected levels may indicate deficiencies in the cable’s power delivery capabilities.
Equipment Needed: Power Detector;
Steps to Perform this Test:
- Locate the connectors on both ends of the USB cable.
- Turn on the power detector and ensure it is in the voltage measurement mode.
- Touch the probes of the power detector to the corresponding power pins inside the USB plugs.
- Check and record the voltage value displayed on the power detector.
- Repeat the voltage measurement for each power pin inside both plugs to ensure consistency.
Compare the measured voltage values with the expected voltage levels for the specific USB cable. Significant deviations may indicate issues with power delivery.
The electrical testing methods we just discussed could also be done with a multimeter if you are testing a USB cable individually. However, large-scale production demands dedicated electrical testing equipment. At APPHONE, we utilize power detectors to ensure each USB cable meets our stringent quality standards, guaranteeing a reliable product for our customers.
| Advantages and Disadvantages of Electrical Testing Methods | |
|---|---|
| Advantages | Disadvantages |
| Highly accurate and reliable in detecting cable functionality; Provides detailed information about the electrical characteristics of the cable; Useful for diagnosing specific problems with the cable; | Requires specialized equipment and technical expertise; Can be time-consuming, especially when testing multiple cables; |
Push and Pull Test
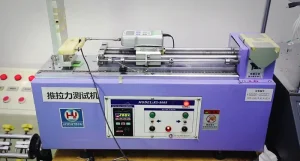
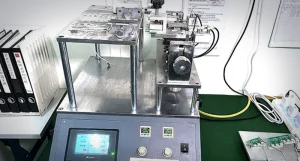
Another method for phone cable testing is the push and pull force test. In this procedure, a push pull tester machine is used to apply cyclic pull forces to the cable. The machine clamp securely clamps the cable and pulls it in opposite directions to simulate the stresses and strains it may encounter during everyday use.
This test is crucial for evaluating the physical robustness and durability of USB cables. By subjecting the cable to cyclic pull forces, we can assess its ability to withstand bending, pulling, and twisting forces, providing valuable insights into its overall integrity and reliability.
Steps to Perform this Test:
- Secure the USB cable in the push pull tester machine clamp, ensuring proper alignment.
- Activate the machine clamp to apply cyclic pull forces to the cable.
- Monitor the cable’s response to the applied forces.
- Perform several tests on different samples of the same cable to ensure consistency and reliability of the results.
If the cable withstands the cyclic pull forces without issues, it passes the push and pull test.
| Advantages and Disadvantages of Push and Pull Test | |
|---|---|
| Advantages | Disadvantages |
| Automated testing process eliminates subjective assessment. Provides consistent and repeatable results. Useful for identifying potential weaknesses in cable construction. | Requires specialized equipment. May not detect internal damage. Limited to physical aspects of cable durability. |
Rocking Test (Swing Tensile Test)
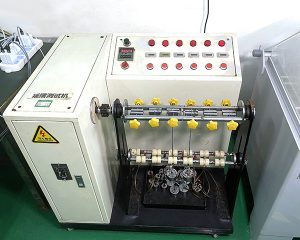
The Rocking Test (Swing Tensile Test) is a crucial evaluation method for assessing the mechanical reliability and stability of USB connectors. This test is designed to mimic the typical movements that the connector may encounter during regular use. This test utilizes a swing testing machine to secure the cable and simulate the rocking motion. Here are the steps to perform this phone cable testing:
- Secure the USB cable in the swing testing machine clamp, ensuring that the connectors are facing away from the clamp.
- Set the machine to create a curve or “U” shape in the cable.
- Run the machine to rock the cable back and forth, alternating the direction of the bend.
- Pay attention to how the cable responds to the bending and rocking motion.
- Repeat the rocking test in different directions and at different points along the cable’s length.
By observing how the cable responds to the bending and rocking motion, it is possible to assess its ability to maintain a secure and stable connection over time, thus gauging its overall durability and reliability. If the cable bends and rocks smoothly without any signs of damage or excessive resistance, it passes the rocking test. However, if the cable feels stiff, resists bending, or shows signs of damage or breakage during test, it may indicate a problem with the cable’s construction or internal components.
| Advantages and Disadvantages of Rocking Test (Swing Test) | |
|---|---|
| Advantages | Disadvantages |
| Provides a consistent and repeatable test method. More accurate and reliable than manual testing. Can perform a large number of tests quickly. Results are less subjective than manual testing. | Requires specialized equipment. Limited diagnostic capabilities. Not suitable for detecting internal damage. |
Unplug and Plug Test
The unplug and plug test uses a Plug and unplug testing machine. It involves setting the insertion angle and distance of the machine and performing cyclic insertion and extraction actions on a USB cable. It is done to assess the physical connection reliability of a USB cable and its connectors. This test evaluates the cable’s ability to maintain a secure and stable connection over multiple cycles of usage, simulating real-world scenarios where devices are frequently connected and disconnected. Through this test, any signs of wear, damage, or degradation in the cable’s connectors can be identified, providing insights into its overall durability and longevity.
Steps to Perform this Test:
- Secure the USB cable in the machine’s clamp and set the insertion angle and distance.
- Program the machine to perform cyclic insertion and extraction actions, ensuring that the connection is secure each time.
- Pay attention to how the cable connects and disconnects.
If the cable connects and disconnects securely without any issues, it passes the unplug and plug test. If the cable feels loose or does not connect securely, it may indicate a problem with the cable’s construction or internal connections.
| Advantages and Disadvantages of Unplug and Plug Test | |
|---|---|
| Advantages | Disadvantages |
| Provides consistent and repeatable test results; Minimizes the risk of damaging the cable or connectors; Can perform a large number of cycles quickly; Can detect intermittent faults; Requires minimal human intervention; | Requires specialized equipment; May not identify all types of connection issues; Limited diagnostic capability; |
Salt Spray Test
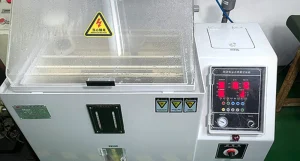
The salt spray test is an essential evaluation method used to assess the corrosion resistance of materials, including USB cables when subjected to harsh environmental conditions. It simulates the effects of exposure to salt-laden atmospheres, such as those encountered in marine or outdoor settings, where corrosion can occur rapidly.
During the salt spray testing, USB cables are placed in a sealed chamber or cabinet, where they are exposed to a fine mist of saltwater solution. This mist creates a corrosive environment that accelerates the natural corrosion process, allowing testers to assess how well the cable’s materials and coatings withstand such conditions.
The test duration can vary depending on the specific standards or requirements set by regulatory bodies or industry standards. Typically, USB cables are subjected to the salt spray for a predetermined period, ranging from several hours to days or even weeks.
Throughout the test, technicians periodically inspect the USB cables for signs of corrosion, such as rust, discoloration, or degradation of materials. These observations are recorded and analyzed to determine the cable’s corrosion resistance and suitability for its intended application.
Equipment Needed: Salt spray chamber, USB cables, Salt solution (mixture of sodium chloride (NaCl) and distilled water).
Steps to Perform this Test:
- Prepare the salt solution according to the desired concentration, typically 5% NaCl in distilled water.
- Place the USB cables inside the salt spray chamber, ensuring they are positioned to receive uniform exposure to the salt spray.
- Turn on the salt spray chamber and set the desired temperature, humidity, and duration of the test. Common test durations range from 24 hours to several weeks.
- Periodically monitor the salt spray chamber to ensure it is functioning properly and the salt solution is being evenly distributed.
- After the test duration is complete, remove the USB cables from the salt spray chamber and inspect them for signs of corrosion, such as rust, pitting, or discoloration.
USB cables that show minimal or no signs of corrosion after the salt spray test are considered to have good corrosion resistance. USB cables that exhibit significant corrosion or damage may not be suitable for harsh environments and may require additional protective measures or alternative materials.
Remember, salt spray testing provides valuable insights into the corrosion resistance of USB cables, but it is important to consider other environmental factors and real-world conditions when assessing the overall durability and reliability of the cables.
| Advantages and Disadvantages of Unplug and Plug Test | |
|---|---|
| Advantages | Disadvantages |
| Provides accelerated assessment of corrosion resistance; Allows for early detection of potential corrosion issues; Helps in evaluating the effectiveness of protective coatings; Widely recognized and standardized test method; Can be used to compare the corrosion resistance of different materials; | Requires specialized equipment and facilities; Test results may vary depending on test parameters; Test duration can be lengthy, impacting time and cost; Results interpretation may require expertise; |
Temperature Test and High-Temperature Test
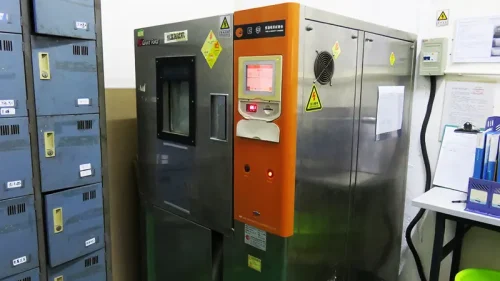
The temperature test and high-temperature test are essential methods for evaluating the performance and reliability of USB cables under varying temperature conditions in a thermostatic chamber. These tests assess the cable’s ability to function properly within specified temperature ranges and its resistance to extreme heat. Here’s an overview o“f both tests:
The temperature test involves exposing the USB cable to a range of temperatures, typically from -40°C to 85°C, to simulate different environmental conditions. The cable’s performance is monitored throughout the test, including its electrical characteristics, data transmission capabilities, and physical integrity.
The high-temperature testing focuses specifically on the cable’s ability to withstand extreme heat. It involves exposing the cable to elevated temperatures, often exceeding 85°C, for a specified duration. This test evaluates the cable’s resistance to melting, insulation degradation, and other heat-related failures.
Equipment Needed:
- A thermostatic test chamber
- The USB cables are to be tested.
- Depending on the specific parameters being evaluated, this may include electrical testers, data transmission testers, and physical inspection tools.
Steps to Perform this Test:
- Place the USB cables inside the thermostatic chamber, ensuring they are positioned to receive uniform exposure to the desired temperature.
- Set the thermostatic chamber to the desired temperature for testing. This may vary depending on the specific requirements or standards for USB cable testing like temperature test or high temperature test.
- Leave the USB cables inside the chamber for the predetermined duration of the test, allowing them to be exposed to the environmental conditions for assessment.
- Periodically monitor the USB cables during the test to observe any changes in their appearance, performance, or functionality.
- Conduct electrical tests and data transmission tests at different temperature points to assess the cable’s performance.
- After the test is complete, remove the USB cables from the temperature chamber and inspect them for any signs of damage or degradation.
USB cables that pass the constant temperature test and high-temperature test without any significant performance degradation or physical damage are considered to meet the specified temperature requirements. Cables that exhibit performance issues or damage during the tests may require design modifications or alternative materials to improve their temperature resistance.
Please keep in mind that APPHONE’s test conditions (such as temperature range, duration, and evaluation criteria) can be customized according to the intended use of the customer’s USB cable.
| Advantages and Disadvantages of Temperature Test | |
|---|---|
| Advantages | Disadvantages |
| Simple and easy to perform; Provides basic insights into cable performance at different temperatures; Helps in evaluating the effectiveness of protective coatings; Helps identify potential issues with cable materials and insulation; | Does not provide detailed information on cable behavior under load; Results may vary depending on test setup and conditions; Limited applicability for assessing high-temperature performance; |
What is the Importance of USB Cable Detection?
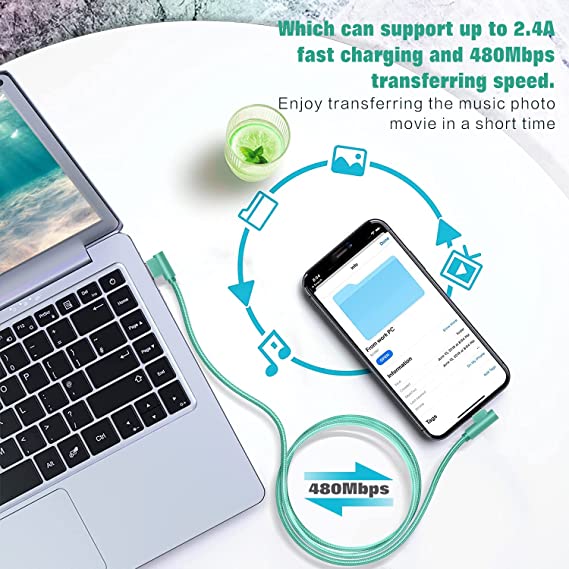
USB cables are essential for connecting devices and transferring data, but they can become damaged or malfunction over time. Detecting issues with USB cables early is crucial to prevent data loss, and hardware damage, and ensure reliable performance. Here are some key reasons why USB cable detection is important:
- Data Loss Prevention:
Damaged or faulty USB cables can lead to intermittent connections or complete failure, resulting in data loss during transfers. Early detection of cable issues allows you to take prompt action, such as replacing the cable or transferring data using an alternative method, to minimize the risk of data loss. - Hardware Protection:
Defective USB cables can cause power surges or fluctuations, potentially damaging connected devices. By detecting cable problems early, you can prevent damage to sensitive electronic components, such as smartphones, laptops, external hard drives, and other peripherals. - Reliable Performance:
Faulty USB cables can cause slow data transfer speeds, connection errors, and device malfunctions. Detecting and resolving cable issues ensures optimal performance and a seamless user experience. - Enhanced Productivity:
Intermittent connections and data transfer issues caused by faulty USB cables can hinder productivity and workflow. Early detection and replacement of problematic cables help maintain uninterrupted connectivity and productivity. - Cost Savings:
Replacing a damaged USB cable is typically more cost-effective than repairing or replacing damaged devices due to cable-related issues. Proactive cable detection and maintenance can save you money in the long run. - Safety:
Damaged USB cables can pose safety hazards, such as electrical shorts or overheating, which can lead to accidents or injuries. Detecting and discarding faulty cables ensures a safe environment for users and devices. - Compliance with Standards:
Certain industries and organizations have specific standards and regulations regarding the quality and safety of USB cables. Detecting and using compliant cables helps ensure adherence to these standards and regulations. - Environmental Sustainability:
Avoiding unnecessary cable replacements by detecting and repairing issues early contributes to environmental sustainability by reducing electronic waste.
If you want to know more about how usb cable is produced step by step, jump over to this blog, “Complete USB Cable Manufacturing Process Guide”.
We hope the USB cable testing methods we discussed above give you a good insight into how USB cables can be tested. These USB mobile cable testing methods are the key to the reliability and proper functionality of your USB cables. Reliable brands like APPHONE make sure the testing of USB cables is done at a high level and as well as longer durability as well.
At APPHONE we deliver the most dependable USB cables through stringent quality control standards.
More than anything, we want our customers to trust that their devices are safe when using our products. That’s why we subject every cable design and batch to rigorous testing, meeting certifications like MFI, CE, and more. Our quality assurance procedures guarantee everything that leaves our factory adheres to the highest specifications for performance and durability.
Whether you need basic charging cables, lighting connectivity, or specialty styles – you can count on APPHONE to provide reliable solutions. We design our diverse product range with the latest charging tech to best serve users’ needs.
But what sets us apart is our customization abilities. We have the flexibility to craft customized lengths, materials, colors, and even OEM/ODM production. This allows businesses to meet unique application requirements with branded cables built exactly to their specifications.
So, if you’re looking for USB cables backed by a rigorous quality process, don’t hesitate to reach out. We’re ready to help you find the right solutions to elevate your brand and take your business to new heights. Reliability is in our DNA – trust APPHONE with all your connectivity needs.
How do I test my USB power cable?
There are various methods you can use to test your USB power cable. For instance, to check the voltage of the USB cable, set the multimeter to DC voltage mode. Next, place the black probe on the black wire (ground wire) and then place the red probe on the red wire (power wire). The multimeter will show the voltage level in volts. The voltage level should be within the range of 4.5 to 5.5 volts. Also, you can perform push and pull and plug and unplug tests.
How do I know if my USB cable is faulty?
If your USB cable is faulty, you may experience issues such as intermittent charging, slow data transfer, loose connections, or visible physical damage like frayed wires. You can also check in some other ways too, like start by connecting the device to another USB port. If it works, then the problem is the first port; if the device remains undetected, you have a faulty device. (Note that if you can’t reformat the USB drive, it will need replacing.)
What is the resistance of a USB cable?
A typical USB cable interface contact resistance is approximately 30mΩ. Since there are four connections (two on each cable end), this represents 0.12Ω. Assuming a standard 24AWG wire for each power line and a 1m cable length, the total wire resistance is 0.166Ω.
What is the cable tester?
A cable tester is used to verify that all of the intended connections exist and that there are no unintended connections in the cable being tested. When an intended connection is missing it is said to be “open”.
Why do we test cables?
Cable testing plays a paramount role during the installation of new cables and the troubleshooting of existing ones. Cable testers are essential diagnostic tools that check a system’s reliability and performance by identifying and analyzing faults and cable network glitches. However, the testing is not only limited to testing with cable testers. At APPHONE, we perform various testing methods during production to make sure the cable production is of top-notch quality.
How do I know if my USB cable has data?
You can test if your USB cable has data functionality by connecting it to a device and checking if you can transfer data between your device and a computer, or if you can access features like file transfer, syncing, or USB debugging. A data cable will usually have four wires, one positive and one negative, one for receiving data and one for transferring data. A charging cable, however, will typically only have two wires, the positive and negative ones but none of the data wires.
Share This Artcle:

Fast delivery
Fastest delivery within 22 days

Quick proofing
Fastest 3-day proofing cycle

After-sale protection
24-month long warranty

1V1Customer Service
Professional customer service follow-up

